Essential Guide to Successful Sauna Installation: Tips and Insights
15 Minute Read
Thinking about adding a sauna to your home? This sauna installation guide walks homeowners through everything they need to know about sauna installation—from choosing the right type and location to step-by-step assembly, safety, costs, and ongoing maintenance. Whether you're considering a DIY infrared kit or a traditional wood-burning sauna, you'll find practical advice and expert tips to ensure a safe and successful project.
Key Takeaways
- Most modern home saunas—including Jacuzzi® infrared and modular kits—can be assembled in a single day by two people with basic tools. Pre-fabricated panels lock together without framing, making the process far simpler than building a custom room from scratch.
- Your first critical decision is choosing between indoor vs. outdoor placement and selecting your heater type: infrared panels for gentler warmth and simpler electrical needs, or traditional electric/wood-burning stoves for authentic high-heat experiences.
- A dedicated electrical circuit is non-negotiable. Smaller infrared units often run on 120V 15-20A circuits, while larger traditional heaters require 240V 30-40A service—always installed or inspected by a licensed electrician.
- Safety and longevity depend on a flat, dry, non-combustible base and proper ventilation with manufacturer-specified clearances around the heater.
- This article walks through site selection, permits, assembly steps, costs, and maintenance, using Jacuzzi® infrared sauna setups as a practical benchmark for quality and installation standards.
Essential Considerations Before You Begin
- Sauna installation involves clearances for heaters, ventilation setups, and adherence to local codes and safety regulations.
- Proper ventilation is essential for sauna installations to manage humidity and airflow, typically requiring an intake and exhaust system.
- The installation of saunas may require permits and compliance with local building regulations, especially for electrical work and accessory structures.
- Moisture management is crucial in sauna installation; saunas should not be placed on carpet to avoid mold issues.
- Accessibility is an important factor when choosing a location for your sauna, ensuring it is convenient for use.
- Choosing a location for your indoor sauna is crucial for its functionality and accessibility.
- The ideal room for an indoor sauna should have proper ventilation, ample space, and easy access to electrical and plumbing fixtures.
- Electrical and fire safety is essential in sauna installations.
- Saunas should be built with non-inflammable materials to enhance fire safety.
- The placement of the sauna stove should be in a safe, accessible area and away from any flammable materials.
How to Set Up and Install a Home Sauna (Step-By-Step Overview)
From the moment your sauna arrives to your first session wrapped in soothing warmth, the journey is more straightforward than most homeowners expect. Using a typical 2-3 person Jacuzzi® infrared cabin as our reference, the complete installation often takes just four to eight hours with two adults working together. The process transforms what looks like a stack of panels into a personal wellness retreat.
The main stages of installation include:
- Choose sauna type and location – Decide between infrared or traditional heating and identify the ideal spot indoors or outdoors
- Prepare the base and utilities – Level the floor, run electrical, and plan ventilation
- Assemble walls, roof, and benches – Lock panels together and install interior components
- Connect heater and controls – Mount heating elements and wire control systems
- Run test and final safety checks – Verify temperatures, door operation, and electrical connections
Infrared cabin saunas typically arrive as tongue-and-groove wall panels, floor sections, ceiling pieces, and a glass door that lock together without traditional framing work. The panels often include pre-installed wiring harnesses that simply plug into a central control unit.
Outdoor barrel or peaked-roof saunas follow the same logical sequence but demand more attention to foundation preparation, roof installation, and weatherproofing. Barrel designs require tensioning stainless steel bands around curved staves, while cabin-style outdoor units need proper sheathing and roofing materials.
Important: Model-specific instructions and installation videos from your manufacturer—such as Jacuzzi® specification sheets and install brochures—must always override generic tips. Your warranty and safety depend on following those details precisely.
Choosing Your Sauna Type: Infrared vs. Traditional
The heater you select determines your electrical requirements, warm-up time, and overall installation complexity. This decision shapes everything from circuit sizing to how you’ll use the space daily.
Key Sauna Types Defined
- Traditional saunas, also known as Finnish saunas, heat the air using an electric or wood-burning stove that warms rocks, which can be doused with water to create steam.
- Infrared saunas heat the body directly using infrared wavelengths instead of heating the air.
- Hybrid saunas combine traditional electric heaters and infrared panels to allow users to choose their desired experience for each session.
- Steam saunas operate at lower temperatures but offer high humidity, which can benefit respiratory health and skin hydration.
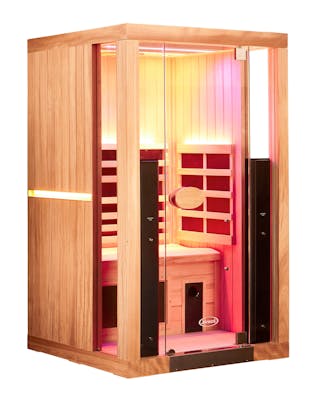
Infrared Saunas
Jacuzzi® and similar brands offer full-spectrum infrared models that heat your body directly rather than heating the air around you. Key characteristics include:
- Temperature range: 120–150°F (49–66°C)—notably lower than traditional saunas
- Electrical requirements: Most 2-3 person units operate on 120V 15-20A dedicated circuits; larger cabins may require 240V 20A
- Warm-up time: Typically 10–20 minutes to reach operating temperature
- Assembly: Pre-wired panels snap together; minimal construction knowledge needed
- Humidity: Very low, creating a dry heat experience
Traditional Electric Saunas
For those seeking the authentic Finnish sauna experience with steam from water ladled over hot stones:
- Temperature range: 170–195°F (77–90°C)
- Electrical requirements: 240V circuits drawing 30-40 amps for heaters in the 6-9 kW range
- Warm-up time: 30–60 minutes to reach full temperature
- Construction: Requires proper insulation, foil vapor barrier, and ventilation design
- Humidity: Variable—you control it by ladling water on the rocks
Wood-Burning Saunas
Best suited for detached outdoor installations:
- Chimney/venting: Requires proper vent pipe through roof or wall
- Code involvement: More building permits and inspections typically required
- Placement: Should be distanced from main structures due to fire considerations
- Fuel storage: Plan for convenient wood access nearby
Before committing to any heater type, check your local building code, HOA regulations, and any condo or apartment restrictions. Some municipalities have updated their codes between 2020 and 2026 regarding spa equipment and outdoor structures.
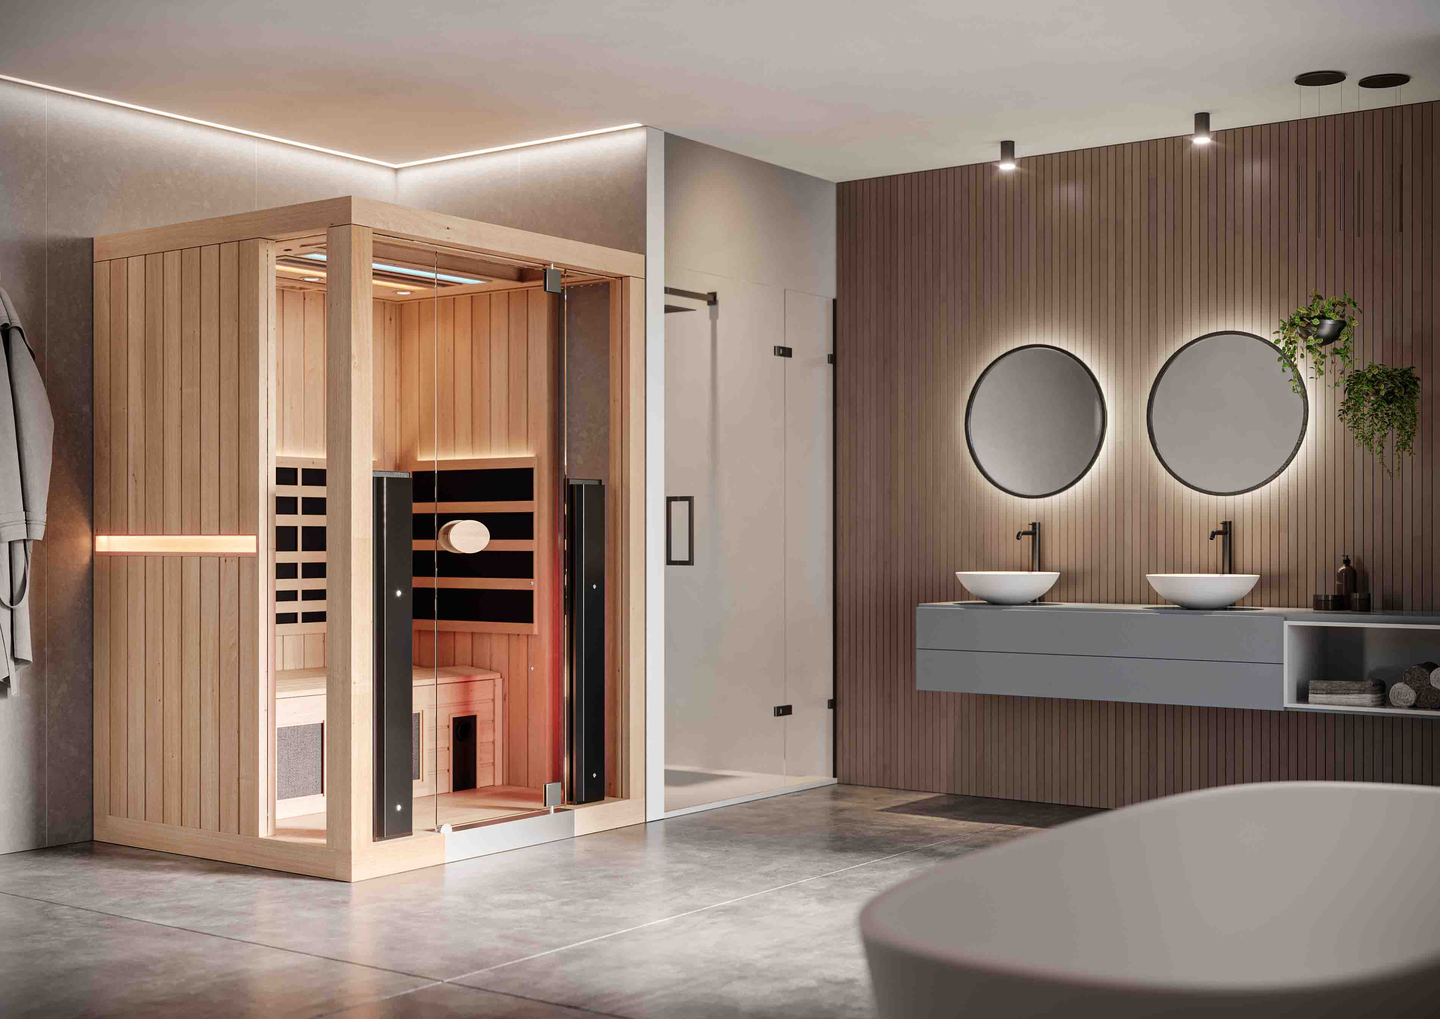
Where to Put Your Sauna (Indoor vs. Outdoor Locations)
Location determines not just installation complexity and cost, but how often you’ll actually enjoy your sauna. The most beautiful sauna in an inconvenient spot becomes an expensive storage room.
Indoor Sauna Installation
Common indoor locations each offer unique advantages and considerations when installing a sauna. A basement provides privacy, a concrete floor, and convenient access to the electrical panel, though you may need to add a moisture barrier and confirm adequate ceiling height. A large bathroom benefits from existing ventilation and proximity to a shower, but space constraints and humidity management must be addressed. A spare bedroom offers ample space and convenience for daily use, although you may need floor protection and additional electrical routing. A walk in closet makes efficient use of existing space but can present size limitations and ventilation challenges. A finished attic provides privacy and makes use of underutilized space, yet floor load capacity and panel access must be carefully evaluated. A garage corner often features a concrete floor and easy electrical access, though temperature fluctuations and insulation needs should be considered.
Before finalizing your location, verify that you have a minimum ceiling height of 7 feet for most kits, the ability to maneuver the largest panel through doors and stairwells, access to GFCI protected outlets where required by code, and adequate ventilation in the room outside the sauna cabin. For those seeking the ultimate in home relaxation, consider complementing your sauna with the J5™ by Jacuzzi®, designed to provide a premium hydromassage experience.
Outdoor Sauna Locations
Outdoor saunas create a dedicated wellness retreat and often pair beautifully with a cold shower, pool, or plunge tub:
- Patios and decks – Verify load capacity (1,000+ lbs for even small barrel saunas with occupants)
- Yard corners – Check setback requirements from property lines
- Poolside – Convenient for contrast therapy between heat and cold water
- Near outdoor shower – Enhances the complete sauna experience
Outdoor installations require clearance from overhead power lines and neighboring structures. A weather-resistant base and properly sloped roof are essential, along with a clear delivery path for large components.
Browse Jacuzzi® dealer galleries and brochures for inspiration—whether you envision an indoor spa corner off your bathroom or a backyard sauna retreat surrounded by nature.
Pre-Installation Planning: Power, Permits, and Base
Careful planning before you begin prevents costly mid-project changes and ensures your sauna meets code requirements. Invest time here to save time, money, and frustration later.
Electrical Planning
Electrical planning depends on the type and size of sauna you choose. A 2 to 3 person infrared sauna typically operates on a 120V 15 to 20 amp circuit or a 240V 20 amp circuit and is often plug in capable. A small traditional electric sauna generally requires a 240V 30 amp hardwired dedicated circuit, while larger traditional electric heaters rated at 8 kW or more usually need a 240V 40 amp or higher circuit. Wood burning saunas require minimal electrical service, typically only to power lighting or optional ventilation fans. Always hire a licensed electrician to install new circuits or inspect your existing electrical capacity. The heater manufacturer’s specifications determine the exact requirements, and wiring or breakers should never be undersized.
Permits and Code Compliance
Contact your local building department to determine permit requirements for:
- New electrical circuits (almost always required for 240V installations)
- Exterior structures (outdoor saunas may be classified as accessory buildings)
- Wood-burning stoves and chimney/vent pipes
- Plumbing if adding a floor drain
Many jurisdictions updated codes between 2020 and 2024, so don’t rely on older information.
Base and Foundation Requirements
Indoor installations:
- Level tile, vinyl, concrete, or sealed hardwood floors work well
- Avoid carpet—moisture and heat create mold and odor problems
- Basements may need a moisture barrier beneath the sauna
- Verify floor can support the combined weight of sauna, occupants, and rocks (if traditional)
Outdoor installations:
- 4-inch reinforced concrete slab provides the most stable base
- Pressure-treated deck rated for appropriate loads (often 1,000+ lbs)
- Compacted gravel with pavers works for lighter infrared cabins
- Plan for a footprint matching your kit—commonly 4×6 ft or 6×8 ft
Ventilation Planning
Even dry infrared saunas benefit from airflow. Plan for:
- Small intake vent near floor level, typically near the heater
- Exhaust vent on the opposite wall, near ceiling height
- Bathroom-style exhaust fan for steam or traditional saunas
- Wall and ceiling clearances as specified by manufacturer (typically 2-6 inches)
Unpacking and Inspecting Your Sauna Kit
Delivery day brings excitement—and responsibility. Proper inspection now prevents headaches during assembly.
What to expect:
- Pallet delivery at curb or driveway (check if liftgate service is included)
- Multiple labeled boxes or wooden crates
- Total weight ranging from 300-800+ lbs depending on model
Handling guidelines:
- Have two adults ready with a hand truck or furniture dolly
- Never flex or bend glass door panels during transport
- Keep panels upright and supported to prevent warping
- Move components to a covered, dry location near your installation site
Typical kit components include:
- Floor panel(s) with leveling feet or pads
- Wall panels labeled A, B, C, D or by position (back, left, right, front)
- Ceiling panel with pre-mounted wiring or light fixtures
- Tempered glass door (8mm typical) with hinges and handle
- Bench boards and support brackets
- Heater unit or infrared panel array
- Digital control panel with temperature and timer functions
- Hardware kit (screws, bolts, clips, rubber gaskets)
- Installation manual and wiring diagram
Before disposing of any packaging:
- Photograph all boxes and contents upon arrival
- Inspect each component for shipping damage, scratches, or cracks
- Compare every piece against the packing list
- Report damage to the carrier and manufacturer immediately
- Keep boxes and padding until assembly confirms everything functions correctly
Indoor Modular Sauna Assembly (Walls, Benches, Door, Heater)
This section covers assembling a modular indoor kit similar to many Jacuzzi® infrared cabins. The process typically requires two people, basic tools, and four to eight hours.
Step 1: Install and level the base
- Position the floor panel in your chosen location
- Use a bubble level to check for level in both directions
- Adjust leveling feet or add shims as needed
- Ensure the floor is stable and doesn’t rock
Step 2: Assemble the walls
- Start with the rear wall panel, aligning it to the floor’s rear edge
- Lock side walls into the rear panel using tongue-and-groove joints or the manufacturer’s latch system
- Confirm corners are square before moving forward
- Have your friend hold panels steady while you secure connections
Step 3: Install front wall and glass door
- The front wall typically comes with the glass door pre-hung
- Gently lift the assembly into position—handle the 8mm tempered glass with care
- Lock the front panel to the side walls
- Adjust door hinges so the door seals properly without rubbing the frame
- Test the door swings outward freely (a critical safety requirement)
Step 4: Mount the ceiling panel
If you need assistance or have questions during installation, feel free to contact the Jacuzzi® support team.
- With all walls secure, lift the ceiling panel onto the wall tops
- Align any electrical connectors or wiring harnesses
- Fasten according to manufacturer instructions
- Connect interior lighting wires to the control harness
Step 5: Install benches
- Locate factory-marked positions for bench supports on the walls
- Secure support brackets with provided hardware
- Place bench tops on supports and fasten from underneath for a clean appearance
- Install backrests and headrests if included
Step 6: Connect heater and controls
- For infrared cabins, panels are often pre-mounted in walls—simply connect the wiring harness to the control unit
- For traditional heaters, mount the wall bracket at specified height, hang the heater, and run dedicated electrical (electrician required)
- Position the control panel outside the hot room at a convenient height
- Follow all clearance specifications—typically 2-4 inches from side walls and 3-6 inches front and back for traditional heaters
Step 7: Complete finish details
- Install any decorative trim pieces
- Mount thermometer and hygrometer
- Add accessories like towel hooks, cup holders, and aromatherapy dispensers
- Verify all connections are secure
Outdoor Sauna Assembly: Roofs, Overhangs, and Weatherproofing
Outdoor builds add roofing and weather protection steps beyond indoor modular kits. This additional construction protects your investment from rain, snow, and UV exposure.
Foundation and wall assembly:
- Position wall modules on the prepared base (concrete slab, deck, or pavers)
- Check corners for square using a framing square or by measuring diagonals
- Secure walls to the base and to each other before proceeding
- For a 6×8 ft cabin with adjacent 4×8 ft changing room, ensure both sections are level and aligned
Roof installation:
- Install roof trusses or support beams according to the design (peaked, shed, or barrel)
- For barrel saunas, assemble curved staves and tension stainless steel bands progressively
- Attach roof sheathing (plywood or OSB) to trusses
- Install sloped or peaked metal roofing with adequate pitch for drainage—at least 2:12 slope for most climates
- Add drip edge and flashing to direct water away from walls
Overhang and entry protection:
- A post-and-beam overhang protects the entry door from weather
- Anchor posts to the base using post brackets or concrete footings
- Lag-bolt horizontal beams to the sauna wall studs
- Cover with roofing material matching the main roof

Explore Saunas


Weatherproofing:
- Seal exterior joints with manufacturer-recommended sealants
- Apply wood stain or penetrating oil to cedar exteriors (protects against UV and moisture)
- Install flashing around any chimney penetrations on wood-burning saunas
- Add rain jackets or caps over exposed barrel sauna ends
- Consider a complete cover for off-season protection
Wood-burning outdoor saunas require additional attention to chimney installation, spark arrestors, and clearances to combustibles—work with qualified professionals for these elements.
Safety, Dos and Don’ts During Installation
Correct installation protects both users and your home for years to come. These guidelines reflect common mistakes seen in DIY sauna projects and manufacturer safety requirements.
Do:
- Use non-combustible materials (cement board, stone, tile) around traditional heaters
- Maintain manufacturer-specified clearances—typically 44-48 inches minimum from heater to ceiling
- Install a smoke detector in the room outside the sauna
- Keep a small ABC fire extinguisher accessible nearby
- Choose heaters with built-in high-limit cutoffs, temperature sensors, and automatic timers (standard on Jacuzzi® and quality brands)
- Ensure the door swings outward and can be opened without special knowledge
- Install heater guards/rails to prevent accidental contact with hot surfaces
- Leave a small gap (approximately 3/8 inch) between floor and wall cladding to prevent moisture wicking
Don’t:
- Modify factory wiring or bypass safety sensors
- Run extension cords or power cords under rugs or through doorways
- Install over carpet or in chronically damp areas without proper ventilation
- Place the sauna directly against unprotected drywall in high-humidity applications
- Use combustible materials within clearance zones
- Seal the sauna so tightly that fresh air cannot enter
- Attempt gas line or wood-burning stove installation without licensed professionals
- Ignore permit requirements—they protect you and maintain insurance coverage
Keep original manuals, specification sheets, and electrical permits accessible for future inspections, maintenance, or when selling your home.
Typical Sauna Installation Costs and Timelines
Costs vary significantly based on sauna size, heater type, and whether you tackle installation yourself or hire professionals. These ranges represent quality products and proper installation—cutting corners on electrical or materials rarely proves cost effective in the long run.
Indoor Infrared Sauna Costs
Indoor infrared sauna costs vary based on size, electrical needs, and finish work. A 2 to 3 person infrared cabin typically ranges from $2,500 to $5,000. Electrical work for a new dedicated circuit generally adds $300 to $800, while minor finish carpentry or trim work may cost between $100 and $300. Altogether, the total project cost usually falls between $3,000 and $6,000. Jacuzzi® level quality typically sits at the higher end of this range, reflecting premium materials, advanced controls, and strong warranty support.
Traditional Indoor Sauna Costs
Traditional indoor sauna costs depend on materials, electrical requirements, and construction scope. A complete sauna kit that includes the walls, benches, and heater typically ranges from $3,500 to $6,000. Framing and insulation can add approximately $500 to $1,500, while a 240V electrical installation generally costs between $500 and $1,200. Vapor barrier materials and ventilation components usually add another $200 to $400. In total, a traditional indoor sauna project typically falls between $4,500 and $8,000.
Outdoor Sauna Costs
Outdoor sauna costs vary depending on the size of the unit, site preparation, and utility requirements. A barrel or cabin kit typically ranges from $4,000 to $8,000. Concrete slab installation or deck modifications can add approximately $800 to $2,500 depending on the scope of work. Roof installation and weatherproofing generally cost between $500 and $1,500, while electrical trenching and wiring may range from $600 to $2,000 based on distance and complexity. Altogether, the total project cost for an outdoor sauna installation typically falls between $5,000 and $12,000.
Timeline Expectations
Timeline expectations vary depending on the type of sauna and level of construction involved. A pre built infrared cabin assembly typically takes about four to eight hours to complete. A modular traditional indoor kit generally requires one full day. An outdoor barrel sauna can usually be assembled in one day, though foundation preparation is completed separately in advance. A custom built sauna room is the most time intensive option, often taking three to seven days plus additional time for inspections. In most cases, two people can complete a modular kit assembly in half a day to one full day, while custom built rooms require coordination between multiple trades and inspection scheduling.
Ongoing Maintenance After Installation
Proper care extends the life of both your heater and interior wood, ensuring years of enjoyable sessions. The good news: saunas require minimal maintenance compared to pools or hot tubs.
After Each Use
- Wipe benches and backrests with a dry towel to remove sweat
- Leave the door cracked open until interior wood is completely dry
- Allow adequate cool-down time before closing up completely
Monthly Care
- Inspect heater elements and connections for any visible issues
- Check that ventilation openings remain unobstructed
- Wipe interior surfaces with a damp cloth (no harsh chemicals)
- Verify thermometer and controls function correctly
Seasonal Maintenance
- Sand any light stains or rough spots on benches once or twice a year
- Re-oil exterior wood on outdoor saunas based on climate (every 12–24 months in most regions)
- Check and tighten stainless steel bands on barrel saunas as wood seasons
- Inspect roof, flashing, and weatherproofing for any deterioration
Heater specific care varies depending on the type of system you install. Infrared panels should be checked periodically to ensure all connections are secure, and any failed LEDs or control components should be replaced as needed. Traditional electric heaters require the sauna stones to be replaced every one to three years depending on frequency of use, and the heater should be vacuumed regularly to remove dust and debris buildup. Wood burning heaters require annual chimney cleaning along with inspection of the firebox and door gaskets to ensure safe operation. Always review the maintenance section of your Jacuzzi® or equivalent product manual for model specific schedules and warranty conditions. Following manufacturer guidelines helps keep your warranty valid and your sauna performing at its best
.
FAQ
Q: Can I install a home sauna myself, or do I need a professional?
Most modular infrared cabins are specifically designed for DIY assembly—panels lock together, and wiring harnesses simply plug in. However, the electrical hook-up should always be completed or at least inspected by a licensed electrician to ensure safety and code compliance. Complex custom builds or wood-burning installations typically require professional trades for framing, electrical, and chimney work.
Q: How much space do I really need for a small indoor sauna?
A compact 2-person infrared unit fits in approximately 4×4 feet of floor space, though you’ll need additional clearance for the door to swing outward and room to move around outside the cabin. For a 3 person traditional sauna, plan for at least 5×6 feet inside the sauna room, plus access space. Always verify your ceiling height meets the minimum requirement—typically 7 feet for most kits.
Q: Do I need plumbing or a drain for a sauna?
Infrared and dry traditional saunas typically do not require plumbing or floor drains. Users simply wipe up any moisture with towels after sessions. However, if you plan to ladle significant water on traditional sauna rocks or build a steam room, a floor drain with appropriate slope (1-2%) and waterproof membrane becomes beneficial for managing moisture.
Q: Will installing a sauna increase my electricity bill significantly?
Home saunas typically draw between 1.5 and 4.5 kW depending on size and type. For a typical usage pattern of three to five 30-40 minute sessions per week, expect a modest monthly cost increase—often $15-40 depending on local electricity rates and heater efficiency. Infrared saunas generally cost less to operate than traditional electric models due to lower power requirements and shorter warm-up times.
Q: Can I put a sauna on the second floor or in an upstairs condo unit?
Upper-story installation is possible but requires additional considerations. Check your floor’s load rating—most residential floors support 40 lbs per square foot, which accommodates lighter infrared cabins. Building rules in condos may restrict outdoor-venting, noise, and electrical modifications. Favor lighter infrared models over heavy masonry heaters or wood-burning units. Additionally, consider sound transmission to units below and ensure your building’s electrical capacity can support the additional load.
Learn More With Our Hot Tub Buying Series
Unlock the secrets to the perfect hot tub with our exclusive email series. Get expert advice and tips right in your inbox. Subscribe now and take the first step towards finding your ideal hot tub.
Hot Tub Buying Series
Explore Categories


Explore Products


Swim Spa
The latest powerful swim current technology and the historic performance of Jacuzzi® PowerPro™ jets combine to deliver the perfect swim, year-round.
Sauna
Jacuzzi® Infrared Saunas are engineered with full spectrum (near, mid and far) front-facing IR heaters, along with Red Light therapy. Enjoy a comprehensive sauna experience in a single sauna session.